The Best No-Bake Dessert

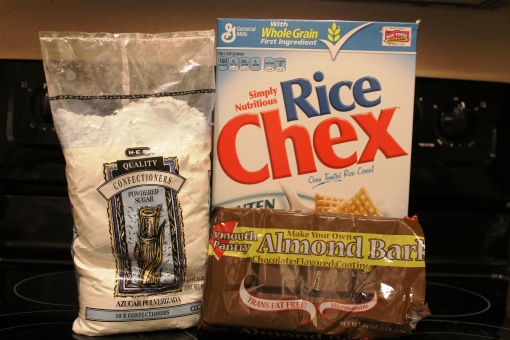
The ingredients I used to make puppy chow: rice Chex, chocolate bark and powdered sugar. (photo: Nikki Dulay)

The ingredients I used to make puppy chow: rice Chex cereal, chocolate bark and powdered sugar. (photo: Nikki Dulay)

I know the title of this blog implies that it’s a baking blog. But to me, baking just means desserts. And dessert is just any sugary goodness. So I find this next recipe completely appropriate for this blog.

Sometimes we need to whip up a quick dessert for a party or potluck. Other times we just want dessert but don’t have the energy to actually turn on the oven. Puppy chow is the perfect solution to these problems.

And no, this is not some kind of dog food. (It actually has a lot of chocolate in it, so you definitely shouldn’t feed it to your dog.)

This is the best no-bake dessert for amateurs since it only requires three ingredients and less than 30 minutes. It’s like the deliciousness of a baked dessert but not as time consuming and less energy.

Puppy Chow Recipe

  • 1 box of rice or corn Chex cereal
  • 1 package of chocolate bark (plain or vanilla)
  • 1 package of powdered sugar

Instructions

Find a container that you can put a lid over. I used two big mixing bowls that were about the same size. You can also use a brownie pan with a cover, a disposable baking pan with a cover or even just a gallon sized plastic bag.

Pour the entire box of Chex cereal into the container you use.

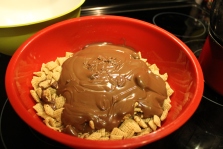
Pour the melted chocolate over the Chex cereal. (photo: Nikki Dulay)

Pour the melted chocolate over the Chex cereal. (photo: Nikki Dulay)

Melt the chocolate bark in the microwave or by using the double boiler method. Click here to read in-depth instructions on how to melt chocolate properly.

If you like a chocolate and peanut butter combination, you can also add a scoop of peanut butter to melt into the chocolate.

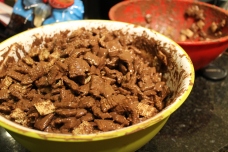
The Chex cereal after it's been mixed with the melted chocolate. (photo: Nikki Dulay)

The Chex cereal after it’s been mixed with the melted chocolate. (photo: Nikki Dulay)

Once the chocolate is completely melted, pour all of it on top of the Chex cereal.

Put the lid or cover over your container and shake the container like it’s an arm workout. You want to try and coat every Chex piece in chocolate.

After a few minutes, take the cover off and see if everything mixed together. If there are a few naked Chex pieces, you can just use a spatula or spoon to mix the pieces with chocolate.

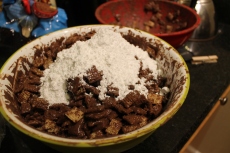
Pour as much powdered sugar as you like on top of the chocolate-Chex mixture. (photo: Nikki Dulay)

Pour as much powdered sugar as you like on top of the chocolate-Chex mixture. (photo: Nikki Dulay)

When all of the Chex pieces are covered in chocolate, pour the powdered sugar on top of the mixture. There’s no exact amount you need. Pour as much as you like. You can always add more if there’s not enough.

Again, put the lid or cover over your container and shake it like crazy so that the Chex pieces are covered in both chocolate and powdered sugar. Use a spatula or spoon to help mix everything if the shaking doesn’t completely cover all of the Chex pieces.

Helpful Hint: If you’re using a plastic bag, watch out for holes! There is nothing more disastrous than powdered sugar and melted chocolate flying all over the place in the middle of shaking.

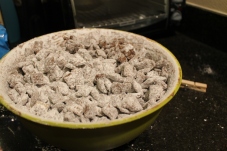
This is how the finished puppy chow dessert should look. (photo: Nikki Dulay)

This is how the finished puppy chow dessert should look. (photo: Nikki Dulay)

Once everything is mixed together, the puppy chow is done and ready to snack on! Keep the puppy chow in a Tupperware container so it stays fresh.

Puppy chow is my favorite no-bake dessert. To me, it tastes just as delicious as a fresh chocolate chip cookie.

What tasty no-bake dessert recipes do you love to make? Share your recipes with me in the comments below!
The Ultimate Dessert Combination

The ultimate dessert combination is the cookie brownie. (photo: Nikki Dulay)

The ultimate dessert combination is the cookie brownie. (photo: Nikki Dulay)

Mac ‘n cheese. Peanut butter and jelly. Green eggs and ham. Yes, these are all traditional, yet delicious, food combinations.

But you have not lived until you have had the ultimate dessert combination, the cookie brownie.

It’s the gooey, cake-y deliciousness of brownies combined with the classic chocolate-chip cookie.

And it’s the absolute perfect treat for your taste buds.

One of my friends from theatre club in high school made cookie brownies all the time. When she taught me how to make them, I couldn’t believe how easy it was. And easy recipes are the best recipes for amateurs.

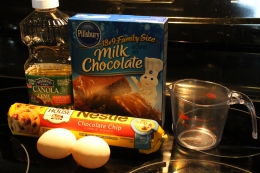
You only need a few ingredients to make cookie brownies: a box of brownie mix and a roll of cookie dough. (photo: Nikki Dulay)

You only need a few ingredients to make cookie brownies: brownie mix, eggs, oil, water and cookie dough. (photo: Nikki Dulay)

Cookie Brownie Recipe

  • 1 box of brownie mix plus required ingredients from the instructions
  • 1 roll of ready-to-bake cookie dough

Instructions

Heat the oven to 350 F.

Combine the brownie mix ingredients together in a mixing bowl until there are so lumps.

Take out a baking pan. If you like thick brownies, use a 9-by-9 baking pan. If you prefer thinner brownies, use a 13-by-9 baking pan.

If the baking pan is not non-stick, spray it with some non-stick spray.

Pour the brownie batter in the baking pan.

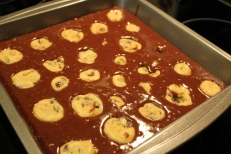
Place medium-sized cookie dough balls in the brownie batter.

Place medium-sized cookie dough balls in the brownie batter. (photo: Nikki Dulay)

Open your cookie dough roll. Take a medium-sized piece of the cookie dough and roll it into a ball.

Place the ball in the brownie batter in the baking pan. Push the dough to the bottom of the pan. It’s okay if it gets submerged in the brownie batter.

Continue this step until you have used all of the cookie dough. Place the cookie dough balls evenly around the baking pan in the brownie batter.

Don’t worry about the balls being the exact same size. This won’t affect the cooking process.

When you are done, bake the cookie brownie combination in the oven for 30-40 minutes, or until it is thoroughly cooked.

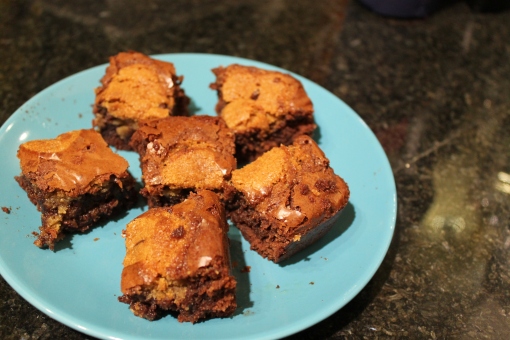
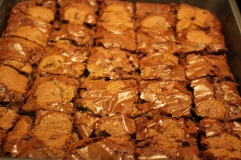
The finished cookie brownies cut into individual pieces. photo: Nikki Dulay)

The finished cookie brownies cut into individual pieces. (photo: Nikki Dulay)

Use a toothpick to poke the middle of the pan to check if your cookie brownies baked all the way through. Bake for an additional 4-5 minutes if the toothpick comes out dirty.

Let the cookie brownies cool for at least 10 minutes before cutting into them.

That’s it! Super easy, super yummy.

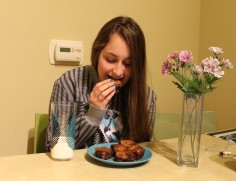
My roommate, Kellie, taste testing the cookie brownies I baked. (photo: Nikki Dulay)

My roommate, Kellie Apodaca, taste testing the cookie brownies I baked. (photo: Nikki Dulay)

I placed a few cookie brownie pieces on a plate and poured a glass of milk for my roommate to try them.

“They taste like happiness,” said Kellie Apodaca after her first bite.

What do your cookie brownies taste like? Do you prefer to eat your cookie brownies with a glass of milk or topped with ice cream? Share your cookie brownie adventures in the comments below!
Completely Edible Cupcakes

Cake is delicious. Universal truth? I think so.

But cake is kind of messy. You have to cut the cake into pieces, and then use a fork to eat it off of a plate.

Then came this genius who decided to make cake portable. Bam. The cupcake was born. The delicious goodness of cake and icing in an individual-sized portion.

But then you have the cupcake wrapper. You have to find a place to throw it away once you’re done eating the cupcake. Ain’t nobody got time for that.

In our advanced society of smartphones and 3-D printers, we have finally discovered a way to eliminate this cupcake hassle and enjoy a 100 percent edible cupcake.

Cupcakes in ice cream cones.

Cupcake cones are a fun twist on making cupcakes. And they’re really easy, which is always a plus.

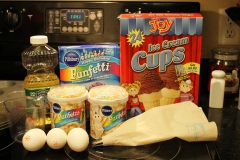
The ingredients I used to make the ice cream cone cupcakes. (photo: Nikki Dulay)

The ingredients I used to make the cupcake cones. (photo: Nikki Dulay)

Cupcake Cone Recipe

  • 1 box of cake mix (any flavor) plus required ingredients from the instructions
  • 1-2 cans of frosting (complimentary to cake flavor)
  • 1 box of wafer ice cream cones

Instructions

Heat the oven to 350 F.

In a mixing bowl, combine the cake mix ingredients together until there are no lumps.

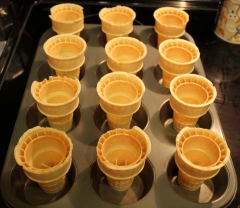
Place one cone in each cupcake tray slot. (photo: Nikki Dulay)

Place one cone in each cupcake tray slot. (photo: Nikki Dulay)

Take out a cupcake baking pan. Place one ice cream cone in each spot on the baking pan.

Pour the cake batter into each cone. Fill the cone about two-thirds full (basically the bottom cylinder part of the cone).

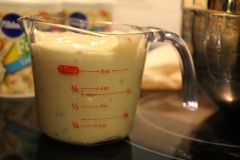
For easy and clean pouring, use a measuring cup to pour the cake batter into each cone. (photo: Nikki Dulay)

For easy and clean pouring, use a measuring cup to pour the cake batter into each cone. (photo: Nikki Dulay)

Helpful Hint: Use a measuring cup to fill each cone with cake batter. This is a faster and cleaner way to pour the batter compared to using a spoon or pouring directly from the mixing bowl.

Bake the cupcake cones for 15-20 minutes. Some cupcake cones will bake faster than others, so make sure to use a toothpick to check if each one cooked properly. If the toothpick doesn’t come out clean, bake the cupcake cones for 2-3 more minutes.

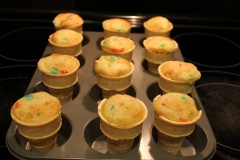
The cooked cupcake cones right out of the oven. (photo: Nikki Dulay)

The cooked cupcake cones right out of the oven. (photo: Nikki Dulay)

Once all of the cupcake cones are cooked, take them out of the oven. Let them cool completely on the counter.

Don’t worry if some of the batter overflowed out of the cone. Perfection is for the professionals.

When the cupcakes are completely cooled, you can frost them. You can use a butter knife to frost them, or you can be fancy and use a decorating tip.

Check out these instructions if you want to learn how to frost with decorating tips. It took me a while to get the hang of it, so don’t be discouraged if your frosting job isn’t perfect right away.

You will probably only need one can of frosting if you use a butter knife. If you use a decorating tip, you will need two cans of frosting.

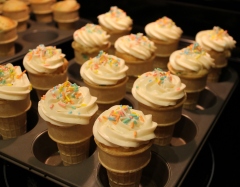
The finished cupcake cones with frosting and sprinkles. (photo: Nikki Dulay)

The finished cupcake cones with frosting and sprinkles. (photo: Nikki Dulay)

You can add sprinkles, like I did, to make your cupcake cones even more fun. Or whatever else you can think of to decorate them.

See? Easy. And look how cute they are! Completely edible and completely fun.

How did you decorate your cupcake cones? Do you have any other fun ways to bake cupcakes? Comment below to let me know!

The Famous Cakeball Recipe

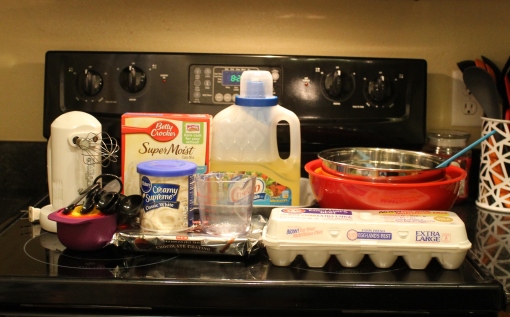
An overview of the ingredients and equipment that I will use to make my cakeballs. (photo: Nikki Dulay)

An overview of the ingredients and equipment that I used to make my cakeballs.
(photo: Nikki Dulay)

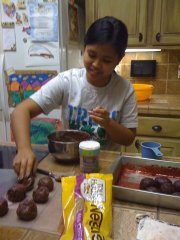
My first cake ball making experience circa 2010. (photo: Maddie Rarick)

My first cake ball making experience circa 2010.
(photo: Maddie Rarick)

What’s the only thing better than cake? Bite-sized cake covered in chocolate.

During my junior year of high school, a friend of mine taught me how to make cakeballs. Since then, cakeballs have become my go-to dessert to bring to parties and give out as birthday treats. They are always a big hit.

Have fun with the recipe and don’t worry about making the cakeballs look perfect. They’ll taste really good, and that’s all that matters. Leave the perfection to the professionals.

The Famous Cakeball Recipe

  • 1 box of cake mix (any flavor) plus required ingredients from the instructions
  • 1 can of frosting (complimentary to cake flavor)
  • 1 package of chocolate bark (plain chocolate or white chocolate)

Instructions

Heat the oven according to the cake mix instructions.

Combine the cake mix ingredients together in a mixing bowl. Pour the batter in a 13-by-9 baking pan. If you don’t have a non-stick pan, make sure to spray some non-stick spray before you pour the batter.

Bake the cake in the oven according to the cake mix instructions. Don’t forget to set a timer!

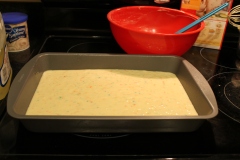
Cake batter in a 13-by-9 baking pan. (photo: Nikki Dulay)

Cake batter in a 13-by-9 baking pan. (photo: Nikki Dulay)

Helpful Hint: While you wait for your cake to bake, wash your mixing bowls, hand mixer attachments and any other equipment that was used. Don’t let everything pile up in the sink. Clean as you go.

When the timer goes off, use a toothpick and poke the center of the cake to check if the cake cooked properly. If the toothpick comes out clean, take it out. If not, bake for a few more minutes.

Leave the cake on the counter and let it cool completely.

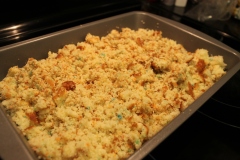
The cake after it's been crumbled. (photo: Nikki Dulay)

The cake crumbled into tiny pieces. (photo: Nikki Dulay)

When your cake has cooled all the way through, use your hands to crumble the cake into tiny pieces. When you’re done, it should look like the picture to the left.

Next, take your can of frosting and dump the entire thing on top of your crumbled cake.

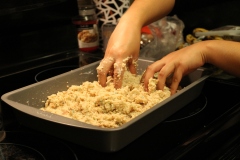
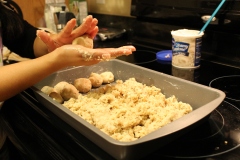
Combine the cake crumbs and frosting together. (photo: Abby O'Connor)

Combine the cake crumbs and frosting together. (photo: Abby O’Connor)

Use your hands to combine the cake crumbs and frosting together. The frosting acts as glue so that the cake can stick together. No part of the mixture should feel like the dry, crumbled cake from earlier.

Form the cake mixture into balls. The balls don’t have to be perfect. You can make them as big or as small as you want. I like to make mine about the size of a golf ball.

Form the cake mixture into balls. (photo: Abby O'Connor)

Form the cake mixture into balls. (photo: Abby O’Connor)

Helpful Hint: Push the cake mixture to one side of the baking pan so you can place the finished balls on the other side. Don’t dirty another pan when you can just reuse the one you’re already working with.

Put the pan full of cakeballs in the freezer for about an hour or until they harden. If you can poke the cakeball with your finger without ruining its shape, then your cakeballs are hard enough.

Melt the chocolate bark in the microwave or by using the double boiler method. For an in-depth explanation and safety tips and on how to melt chocolate properly, check out these instructions.

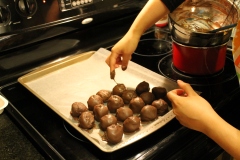
Put the chocolate covered cakeballs on a cookie sheet lined with parchment paper. (photo: Abby O'Connor)

Put the chocolate-covered cakeballs on a cookie sheet lined with parchment paper. (photo: Abby O’Connor)

Take out a medium-sized cookie sheet. This is where you’ll put your chocolate-covered cakeballs. Line the sheet with parchment paper to prevent the cakeballs from sticking to the surface.

Dip all of the cakeballs in the chocolate and cover them completely. Handle the chocolate with caution so you don’t burn yourself.

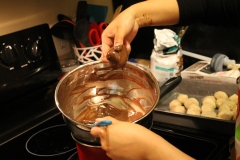
Let any excess chocolate drip off the cakeball (photo: Abby O'Connor)

Let any excess chocolate drip off of the cakeball. (photo: Abby O’Connor)

Hover the chocolate-covered cakeball over the bowl and let any excess chocolate drip off before putting it on the cookie sheet.

Helpful Hint: If the cakeballs start to crumble when you dip them in the chocolate, they are probably getting too soft. Stick them back in the freezer so they can re-harden.

When you finish dipping all of your cakeballs, put them in the freezer for one to two hours, or until the chocolate has completely hardened. It’s best to leave them over night.

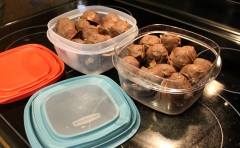
Once the chocolate has hardened, your cakeballs will be ready to eat! Take them off of the cookie sheet and put them in a Tupperware container.

Finished cakeballs stored in tupperware containers (photo: Nikki Dulay)

Finished cakeballs stored in Tupperware containers. (photo: Nikki Dulay)

Store the cakeballs in the freezer. They will stay good for about a month, but you’ll probably eat all of them by the end of the week anyways.

And that’s it! It’s a simple recipe. You just need to be patient with the freezing times.

What flavor combinations will you try? Do you have any other helpful hints that I didn’t mention? Comment below and let me know!